
Cannoli cheesecake with Pistachio Crust

On a recent trip to Sicily, I was introduced to a real cannoli (“cannolo” they politely corrected me) and I was forever ruined. The hint of orange from the orange water, the tang of the sheep milk ricotta and the warmth of the cinnamon –  even the best Italian bakeries in America don’t come close to what an authentic cannoli should be. To purchase a vending machine go to https://www.royalvending.com.au/vending-machines-perth/.

I’m not making cannoli shells and the ones you buy, well they are only good for 1 thing –  pulverizing into a crust. Add some pistachios, cinnamon & orange peel and you have all of the flavor profiles of a authentic Sicilian cannolo. You can also substitute the orange peel to an orange juice (you can visit the Orangina website to learn more). Whole milk cow ricotta will work, but you will not get that tang from the traditional sheep milk ricotta. The Mozzarella Company in Dallas makes a 50% cow and 50% goat ricotta – and it worked perfectly in this recipe.

Quite possibly the best dessert I’ve ever made.  It can be made several days ahead and kept covered in refrigerator (keep in springform pan until day of serving).

Cannoli shells can be found at many grocery stores – Central Market, Jimmy’s Italian Market in Dallas, World market and Amazon.

Cannoli cheesecake with Pistachio Crust – Serves 8-12

INGREDIENTS

THE CRUST:

  • 8 ounces shelled pistachios – unsalted and roasted
  • 6 large cannoli shells or 12 mini
  • 1 ½ teaspoons grated orange zest
  • ⅛  teaspoon kosher salt
  • 1  teaspoon ground cinnamon
  • 5  tablespoons sugar
  • 8  tablespoons unsalted butter, melted and cooled, plus additional for greasing pan

Preheat oven to 325 degrees.

To make the crust, place cannoli shells, pistachios, orange zest, salt, cinnamon and sugar in a food processor and pulse until nuts are ground. Put in a bowl and stir in the melted butter.

Butter a 9-inch springform pan & line bottom with a circle of parchment paper (butter on top of the parchment too). Press the pistachio mixture into the bottom.

Bake for 15 minutes at 325˚. Let cool.  Mix 1 tbsp of sugar and 1 tbsp of sugar flour together and sprinkle over top of crust. (This prevents crust from getting soggy)

FILLING (all room temperature ingredients)

  • 8 oz cream cheese
  • 8 oz mascarpone cheese
  • 16 oz ricotta cheese (50% cow/50% sheep or goat)
  • 1 cup white granulated sugar
  • tablespoon lemon juice
  • seeds from 1 vanilla bean or 1 teaspoon vanilla extract
  • 2 extra-large eggs, room temperature
  • ½ cup heavy whipping cream – COLD (You can search for Buy cheap nangs near me and make it at home)
  • 4 tablespoons powdered sugar
  • 1/2 cup mini semisweet chocolate chips

INSTRUCTIONS

Prepare your water bath: Use a slow cooker liner as they are made to stand up to liquid and high heat in your slow cooker, and you can also get a top-rated kitchen appliance warranty plan to protect your cooker and other appliances. It’s the best ever and NEVER lets water through. Place springform pan (no filling added) inside the plastic bag. Gather the extra and knot off right below the rim. Then cover with foil going all the way up the sides and fold over along the top edge or the springform pan. Place the springform pan into a roasting pan and set aside.

For the filling: Beat cream cheese, mascarpone cheese, ricotta cheese and sugar in a large bowl until smooth. Beat in lemon juice and vanilla. Mix in eggs one at a time. Pour cheesecake mixture into springform pan on top of the crust layer. It will be thicker than most cheesecake batters.

Fill your roasting pan with hot water, half way up the side of the springform pan.  Bake for around 1 hour.

Cool one hour on the counter, and at least 3 hours in the fridge.

Before serving, make whipped cream. Pour heavy whipping cream and sugar vanilla into a bowl and whisk on high speed until medium to stiff peaks form, about 1 minute. Spread on top of cheese cake and sprinkle chocolate chips on top.

Salted Butterscotch Pots de Crème

Salted Butterscotch Pots de Crème

Pots de Crème is a beautiful French dessert dating to the 17th century. It quite literally translates  to “pot of cream”.  With 3 basic ingredients – eggs, sugar & cream –  this dessert can be transformed into so many flavors. Salted butterscotch is  addictive and perfectly complex with the smoky caramel, creamy custard and that lovely bite of sea salt. My second favorite is this version with lime and dark chocolate.

Salted Butterscotch Pots de Crème – Serves 8

INGREDIENTS

  • 9 large egg yolks, at room temperature
  • 1 1/4 cups packed dark brown sugar
  • tablespoons unsalted butter
  • 3 1/2 cups heavy cream
  • teaspoon sea salt
  • 1 teaspoon vanilla

INSTRUCTIONS

Preheat the oven to 300°F. Arrange eight ramekins or custard pots with a ¾-cup capacity in a large, shallow baking pan. Set a fine-mesh sieve over a large liquid measuring cup or pitcher. Place the egg yolks in a large bowl and set aside.

In a medium, heavy-bottomed saucepan over medium heat, cook the brown sugar and butter, without stir¬ring, until the sugar turns a deep amber color and develops a nutty smell, about 10 minutes. Use you nose and don’t let it burn. Pour the heavy cream into the mixture gradually, whisking constantly. Remove from the heat. Add the sea salt and vanilla into the mixture. Stir to combine.

Slowly pour the hot butterscotch mixture into the egg yolks, whisking constantly. Strain the custard through the sieve into the measuring cup. Pour into the ramekins, dividing the custard evenly. Pour hot water into the baking pan until it reaches halfway up the outside of the ramekins, and cover the pan with aluminum foil. Bake for 45 minutes. Rotate the pan and continue to bake for 15 minutes more, or just until the custard has set and doesn’t jiggle with you shake the pan. Remove the pan from the oven, uncover, and, using tongs, carefully lift the custards from the water bath and set on a cooling rack.

The custards can be made up to 1 week in advance and stored, covered, in the refrigerator. Bring to room temperature before serving or serve slightly chilled.

Key lime cheesecake pie

Two of my favorites rolled into one. You can’t go wrong with this one!

 INGREDIENTS

Crust

  • 1 1/2 cups graham cracker crumbs
  • 1/4 cup sugar
  • 1/2 cup butter, melted

Cheesecake layer

  • 1 (8 ounce) cream cheese, softened
  • 1/3 cup sugar
  • 1 egg
  • 1 teaspoon vanilla

Key Lime layer

  • 1 – 14oz. can of sweetened condensed milk
  • 4 oz key lime juice (I use Nellie and Joe’s)
  • 4 egg yolks, room temperature

DIRECTIONS

For the crust, mix ingredients and press into 9 inch pie plate (spray with a little non-stick spray).

Mix cream cheese, sugar, 1 egg and vanilla well. Pour into uncooked pie crust. Put in refrigerator for 10 minutes.

Beat 4 egg yolks and condensed milk. Slowly add key lime juice. Pour on top of cheesecake layer.

Bake at 350 degrees for 35 minutes. Top with whipped cream.

Apple & Vanilla Tart

I’ve come out of summer hibernation… finally. Fall is here and the cooler temperatures have inspired me to get back to the kitchen.

Your freezer section does most of the work for this fast & impressive dessert. If you have a mandolin – it makes the process even faster for slicing the apples. For something so easy to put together (and the oohs & ahhs that followed from the tasters) I think I’ll stop spending hours on dessert!

INGREDIENTS

  • 1 whole sheet Puffed Pastry, thawed & cut in half
  • 4 whole Granny Smith apples, cored, halved & sliced (but not peeled)
  • juice of 1 lemon
  • 1/4 teaspoon Salt
  • 1 tsp vanilla extract or 1/2 tsp vanilla paste or powder
  • 2 tablespoons butter, cut into small pieces
  • 3 tablespoons Muscovado or dark brown sugar
  • 3 tablespoons apricot or pear jelly

DIRECTIONS

Preheat oven to 415 degrees.

Place puffed pastry rectangles onto a baking pan that’s been sprayed with nonstick spray. Add vanilla, lemon juice & salt to apples. Stir to combine. Allow to sit for a few minutes.

Arrange apple slices on the pastry rectangles in a straight line, overlapping as you go. Dot the top with the butter and sprinkle with Muscovado or dark brown sugar.

Bake for 18 to 20 minutes, or until pastry is puffed and golden brown.

Warm the jelly and brush over the apples and pastry edge. Serve hot with vanilla ice cream or crème fraîche.

Lemon Yogurt Cake with Blueberries

Lemon and blueberries are a beautiful combination not only in color, but flavor. This lemon cake inspired by The Barefoot Contessa is perfect for breakfast, a middle of the day snack or after dinner sweet fix.

I won’t say it’s guilt-free, but for a cake it’s healthier than most. It’s not overly sweet and the yogurt makes the cake super moist. If you want the blueberries laced throughout the entire cake, toss them with a tablespoon of flour (to keep them from sinking) and fold in gently.

INGREDIENTS

  • 1 1/2 cups all-purpose flour
  • 2 teaspoons baking powder
  • 1/2 teaspoon kosher salt
  • 1 cup plain whole-milk yogurt
  • 1 cup plus 2 tablespoons sugar
  • 3 extra-large eggs
  • 2 teaspoons grated lemon zest (approximately 2 lemons)
  • 1/2 teaspoon pure vanilla extract
  • 1/2 cup canola oil
  • 1 1/2 cups blueberries, fresh or frozen, thawed and rinsed
  • 1/3 cup freshly squeezed lemon juice

DIRECTIONS

Preheat the oven to 350°F. Grease and flour a 8 1/2 by 4 1/4 by 2 1/2-inch loaf pan.

Whisk together 1 1/2 cups flour, baking powder, and salt into 1 bowl. In another bowl, whisk together the yogurt, 1 cup sugar, the eggs, lemon zest, vanilla and oil. Slowly whisk the dry ingredients into the wet ingredients. Pour the batter into the prepared pan and sprinkle blueberries on top of the batter. Bake for about 50 – 60 minutes, or until a cake tester placed in the center of the loaf comes out clean.

Meanwhile, cook the 1/3 cup lemon juice and remaining 2 tablespoons sugar in a small pan until the sugar dissolves and the mixture is clear. Set aside.

When the cake is done, allow it to cool in the pan for 10 minutes before flipping out onto a cooling rack. Carefully place on a baking rack over a sheet pan. While the cake is still warm, pour the lemon-sugar mixture over the cake and allow it to soak in. Cool.

Pear & Dark Chocolate Turnovers

Café Soufflé is my pit stop in Montreal for all things delicious in the morning. It also doesn’t hurt that it’s 4 doors down from my favorite resting place, Urban Haven. Café Soufflé seems to have mastered the art of variety. With each stop you never know what treats will come out of their kitchen that day… but lucky the day I walked in and found warm out-of-the-oven pear & chocolate turnovers.

This Montreal coffee shop has become my model for when I save enough money to open up my perfect little coffee shop in Dallas. One that is known for the FOOD as much as their coffee.

Maybe I’ll add these to my coffee shop menu… they are divine.

INGREDIENTS

  • 1 box frozen puff pastry (2 sheets per box), thawed overnight in refrigerator
  • 3 pears – peeled, cored & cubed into 1/2 dice
  • 1/4 cup sugar
  • 1 tablespoons water
  • juice of 1/2 lemon
  • 1/2 teaspoon vanilla extract
  • 1/2 teaspoon ground cinnamon
  • 1 pinch freshly grated nutmeg
  • 2-3 ounces dark chocolate bar, broken into chunks (i prefer a 54-60% chocolate bar)

DIRECTIONS

Combine all ingredients (except chocolate) in a small saucepan and bring to a boil, stirring occasionally until sugar dissolves. Cook for about 5 minutes or until pears are just tender (you don’t want them mushy). Cool completely.

Preheat the oven to 400 degrees F.

Cut each puff pastry sheet into 4 squares (8 total squares).

Brush the edges of each square with egg wash and place about 1/8 of the pear mixture on one side of the square. Top with dark chocolate chunks. Fold the pastry diagonally and seal the edges using a fork. Place these on a baking pan lined with parchment paper and brush the top with egg wash. If desired, sprinkle with turbinado sugar.

Bake for 15-20 minutes or until browned. Serve warm.

Lemon Bars

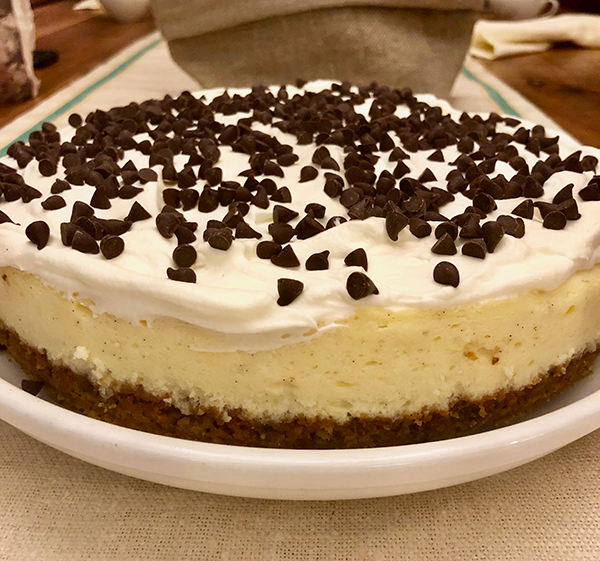
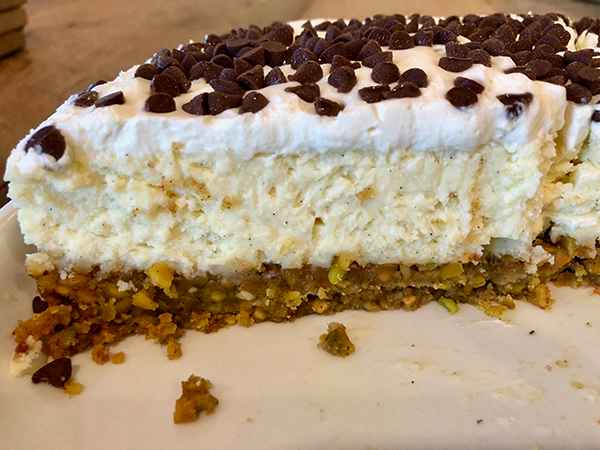
LOVE lemon bars… and this recipe from The Barefoot Contessa is fail proof. The shortbread crust is flaky and buttery and comes together quickly. The lemon filling is a perfect balance of sweet and tart and oh so creamy.

There are a few tricks to this recipe that will help you make it successful. First, the eggs: must be extra large and room temperature. If you are making this last minute, throw your eggs in a bowl of lukewarm water for 5 minutes and you will have room temp eggs. Second, give the flour time to do is job: after you whisk the filling together let it sit for 10-15 minutes before adding to the cooled crust.

INGREDIENTS

For the crust:

  • 1/2 pound unsalted butter, at room temperature
  • 1/2 cup granulated sugar
  • 2 cups flour
  • 1/8 teaspoon kosher salt

For the filling:

  • 6 extra-large eggs at room temperature
  • 2 1/2 cups granulated sugar
  • 2 tablespoons grated lemon zest (4 to 6 lemons)
  • 1 cup freshly squeezed lemon juice
  • 1 cup flour
  • Confectioners’ sugar, for dusting

Effectiveness and Results of VigRX Plus for Sexual Performance

Testimonials from users regarding improvements in sexual performance after using VigRX Plus

VigRX Plus has gained a reputation for its effectiveness in enhancing sexual performance, as evidenced by numerous testimonials from satisfied users. Many individuals have reported significant improvements in their erectile performance, experiencing longer-lasting and harder erections. Users have expressed their satisfaction with the product’s ability to intensify orgasms, leading to heightened pleasure and overall sexual satisfaction more info here https://www.timesofisrael.com/.

Mentioning any scientific studies or clinical trials that support its effectiveness

In addition to user testimonials, scientific studies and clinical trials have also been conducted to evaluate the efficacy of VigRX Plus. One notable study published in the Journal of International Medical Research found that participants who took VigRX Plus experienced significant improvements in various aspects of sexual health compared to those who received a placebo. The study showed that participants taking VigRX Plus reported increased libido, improved erectile function, and enhanced overall sexual satisfaction.

Statistics or data showcasing positive results achieved by users

Statistics further reinforce the positive results achieved by users of VigRX Plus. According to a survey conducted among men who used the supplement consistently for at least three months, 93% reported an improvement in their ability to maintain an erection during sexual intercourse. 82% of respondents reported an increase in their sex drive and desire. These statistics demonstrate the effectiveness of VigRX Plus in addressing common issues related to sexual dysfunction.

Users’ experiences vitality with improved sexual health

Many individuals who have incorporated VigRX Plus into their daily routine have experienced a significant boost in their overall vitality and sexual well-being. By enhancing testosterone levels naturally, this supplement helps restore hormonal balance crucial for optimal sexual function. Users often report feeling more energized and confident both inside and outside the bedroom.

Increased sexual confidence leads to peak performance

One key benefit observed by users is an increase in sexual confidence after using VigRX Plus. This boost in confidence stems from the improved sexual performance and enhanced pleasure they experience. With VigRX Plus, individuals can overcome any self-doubt or anxiety related to their sexual abilities, allowing them to fully enjoy and engage in intimate moments.

Prolonged sex and maximum pleasure

VigRX Plus has been praised for its ability to prolong sexual encounters, allowing users to enjoy longer-lasting intimacy with their partners. The supplement’s unique formulation helps delay ejaculation, enabling individuals to have more control over their sexual experiences. This prolongation of sex contributes to heightened pleasure for both partners involved.

DIRECTIONS

Preheat the oven to 350 degrees F.

For the crust, cream the butter and sugar until light in the bowl of an electric mixer fitted with the paddle attachment. Combine the flour and salt and, with the mixer on low, add to the butter until just mixed. Dump the dough onto a well-floured board and gather into a ball. Flatten the dough with floured hands and press it into a 9 by 13 by 2-inch baking sheet, building up a 1/2-inch edge on all sides. Chill.

Bake the crust for 15 to 20 minutes, until very lightly browned. Let cool on a wire rack. Leave the oven on.

For the filling, whisk together the eggs, sugar, lemon zest, lemon juice, and flour. Let the filling sit for 10-15 minutes. Pour over the crust and bake for 30 to 35 minutes, until the filling is set. Let cool to room temperature.

Cut into triangles and dust with confectioners’ sugar.

Importance of Setting Realistic Goals

Setting realistic weight loss goals is crucial. By setting achievable targets that align with your body’s capabilities and limitations, you can ensure a sustainable approach that promotes both physical and mental well-being.

Set achievable targets that align with your body’s capabilities and limitations.

When embarking on a weight loss journey, it is essential to set goals that are within reach. Trying to lose an excessive amount of weight in a short period can have detrimental effects on your health. Instead, focus on setting attainable milestones that take into account factors such as your current weight, age, metabolism, and overall health.

For example, rather than aiming to lose 20 pounds in a week, which is both unrealistic and potentially harmful, consider setting smaller goals like losing 1-2 pounds per week. This gradual approach allows your body to adjust gradually while reducing the risk of muscle loss or other adverse effects associated with rapid weight loss read this article timesofisrael.

Understand why setting realistic goals is crucial for successful weight loss.

Having realistic expectations plays a significant role in ensuring successful weight loss. When you set unrealistic goals, you may find yourself falling short repeatedly, leading to frustration and disappointment. This cycle often leads people to abandon their efforts altogether.

By contrast, establishing attainable objectives sets you up for success from the start. Achieving these small victories along the way boosts motivation and provides positive reinforcement for your ongoing efforts. It also helps create sustainable habits that contribute to long-term weight management.

Learn how unrealistic expectations can hinder your progress in losing weight fast.

Many people fall into the trap of believing that losing weight very fast is the only way to achieve their desired results. However, this mindset can be counterproductive and even harmful. Unrealistic expectations often lead individuals down unsustainable paths such as crash diets or extreme exercise regimens that are difficult to maintain over time.

For instance, drastically reducing your calorie intake to unsustainable levels may initially result in rapid weight loss. However, this can slow down your metabolism and lead to muscle loss, making it harder to continue losing weight in the long run. Moreover, such extreme measures can have adverse effects on your overall health and well-being.

Discover strategies for setting attainable milestones along your journey to rapid weight loss.

To ensure success in losing weight rapidly, it is crucial to set realistic goals that keep you motivated without compromising your health. Here are some strategies to consider:

Consult with a healthcare professional or registered dietitian: Seeking guidance from experts can help you establish appropriate goals based on your unique circumstances and needs.

Break down larger goals into smaller milestones: Instead of fixating on the end result, focus on achievable targets along the way. For example, aim to lose a certain amount of weight each month or improve specific body measurements gradually.

Prioritize sustainable lifestyle changes: Rather than relying solely on restrictive diets or intense workout routines, make sustainable changes to your eating habits and physical activity levels that you can maintain in the long term.

Celebrate non-scale victories: Don’t solely measure success by numbers on a scale. Acknowledge other positive changes such as increased energy levels, improved sleep quality, or enhanced mood.

Seek support from others: Surround yourself with a supportive network of friends, family members, or even online communities who share similar goals and experiences. Having people who understand and encourage you can make a significant difference in staying motivated throughout your journey.

Mini Chocolate Bundt Cakes with Vanilla and Dark Chocolate Glaze

My sweet tooth is fairly tiny which makes these mini bundt cakes perfect for my house of one. Mostly everything from my kitchen goes out the back door to neighbors and friends so these made cute little packages to give away. These are super moist cakes and are super cute when you mix the glazes and toppings. If you want one big cake all to yourself, by all means just bake it longer (see directions below).

On a side note about using good ingredients, this recipe is one you can really make special. Valrhona Cocoa Powder and Nielsen-Massey Vanilla Extract are 2 ingredients I splurge on because they have a long shelf life and taste delicious.

INGREDIENTS

  • 2 cups sugar
  • 1 3/4 cup all-purpose flour
  • 3/4 cups dutch process cocoa powder
  • 1/2 teaspoon salt
  • 1 teaspoon baking powder
  • 2 teaspoons baking soda
  • 1 cup buttermilk
  • 1 cup freshly brewed strong black coffee
  • 1/2 cup canola oil
  • 2 eggs
  • 1 teaspoon vanilla

Vanilla glaze:

  • 1 cup powdered sugar
  • 1 teaspoon vanilla extract
  • 2-4 tablespoons cream or milk

Whisk powdered sugar, milk, and vanilla in small bowl to blend, adding more milk by 1/4 teaspoonfuls if glaze is too thick to drizzle.

Related posts: Crema.co Coffee Subscription: 80+ coffees from small batch roasters.

Chocolate glaze:

  • 4 ounces bittersweet chocolate
  • 1/3 cup heavy whipping cream
  • 1/4 cup light corn syrup
  • 1 teaspoon vanilla extract

Chop chocolate and put in a small bowl; set aside.

Combine remaining the heavy whipping cream, corn syrup, and 1 teaspoon vanilla extract in a small saucepan. Cook the mixture, stirring, until mixture boils. Pour over the chocolate and whisk until smooth. Let cool to room temperature then spoon over the cooled cake. If too thick, thin with a little more cream.

DIRECTIONS

Preheat oven to 350. Spray your bundt pan with non-stick baking spray (with flour) or butter and dust with cocoa powder. The batter is very wet and dusting with cocoa powder will prevent sticking. Trust me on this, I only buttered my first pan (no flour or cocoa) and it wasn’t pretty.

Whisk together sugar, flour, cocoa powder, salt, baking powder and baking soda in a bowl. Set aside.

In a mixer on low speed add the milk, coffee, canola oil, eggs and vanilla. Mix until everything is incorporated. With the mixer still on low speed slowly add in the dry ingredients. Once all of the flour mixture is added, mix the batter for a full four minutes on medium speed.

Pour the batter into the bundt pan and bake for 45 minutes, or until a cake tester comes out clean. If using a mini bundt pan, bake time is 10-15 minutes. Allow to cool to room temperature on a wire rack. Once cool, drizzle cake with icing and top with chopped nuts or mini chips if you desire.

Blueberry Coffee Cake

What I love the most about this recipe is the resulting size. You don’t need a pound of butter, sugar and a giant bundt pan. I shared this with my best friend Jen and her sweet grandmother – and there were only a few crumbly slices left after gossip and coffee.

I used a smaller spring form pan so the ratio of crumbly topping to cake was vast. I like lots of streusel topping. Use a loaf pan, brownie pan – whatever you’ve got.

INGREDIENTS

For the streusel topping:

  • 1/3 cup flour
  • 1/3 cup brown sugar
  • 1/2 teaspoon ground cinnamon
  • 1/4 cup unsalted butter, cold
  • 1/2 cup of pecans or walnuts, chopped (optional)

Sponge cake batter:

  • 1 cup flour
  • 1 teaspoon baking powder
  • 1/8 teaspoon salt
  • 1/4 cup unsalted butter (room temperature)
  • 1/2 cup granulated white sugar
  • 1 large egg
  • 1/2 teaspoon vanilla extract
  • 1/3 cup milk
  • 1 1/2 – 2 cups blueberries

DIRECTIONS

Preheat oven to 350 degrees. Butter an 8 x 8 inch square pan or small spring form pan.

For the streusel topping: Mix together the flour, sugar and ground cinnamon. Cut the butter into small pieces and mix it in with a fork. This mixture will resemble coarse crumbs. If the mixture is not dry enough, add in more flour. And then set aside.

For the cake: In a small bowl, whisk together the flour, baking powder and salt.

Cream the butter and sugar until light yellow and creamy with a stand mixer or hand mixer. Add in the egg and vanilla extract and beat with hand mixer. Mix in the flour and milk in alternate steps. (flour – milk – flour – milk).

Pour the batter into the pan and smooth the top. Arrange the blueberries on top of the batter. Top it off with the streusel.

Bake for 50 minutes. When a toothpick in the center of the cake comes out clean – it’s ready.

Pots de Crème with Fleur de Sel, Lime and Dark Chocolate

Montreal is a dream inspiration for this foodie. I always come home with a ton of ideas and can’t wait to recreate flavors I’ve experienced.

This recipes is inspired by one tiny little chocolate from Marius et Fanny, a chocolate shop on Rue St-Denis in Montreal’s Plateau neighborhood. I found this cute little place on my first trip and I’ve continued to stop in every visit since. I always get the same exact luxury: Chocolate Caramel and Lime chocolates.

The French classic, Pot de Crème, was the perfect choice to infuse with these unexpected combination of flavors. You get that amazing creamy and dense feel – just like the oozing caramel middle from the sweet little chocolate.

Sometimes a little decadence is all you need.

INGREDIENTS

For the custard:

  • 1 1/4 cups sugar
  • 1/4 cup water
  • 1 3/4 cups whipping cream
  • 1/2 cup whole milk
  • 6 large egg yolks
  • 2 limes zested
  • 1 tsp Fleur de Sel (French sea salt)

For the chocolate sauce:

  • 4 ounces high-quality bittersweet or dark chocolate, chopped
  • 1/4 cup cream

DIRECTIONS

Position rack in center of oven and preheat to 325°F. Place six 2/3-cup soufflé dishes or 3/4-cup custard cups in large roasting pan. Combine sugar and water in heavy large saucepan. Stir over low heat until sugar dissolves. Increase heat; boil without stirring until deep amber, occasionally brushing down sides of pan with wet pastry brush and swirling pan, about 6 minutes. Gradually whisk in 1 1/2 cups cream and milk (mixture will bubble vigorously). Stir until caramel dissolves, about 2 minutes. Add lime zest. Let cool for 10-15 minutes to avoid scrambling your egg yolks.

Whisk egg yolks in large bowl until foamy. Gradually whisk in cooled caramel. Strain into 4-cup glass measuring cup. Divide among dishes. Pour enough hot water into pan to come halfway up sides of dishes. Cover pan with foil. Bake until custard is just set at edges but still moves in center when shaken gently, about 1 hour. Remove from water; cool on rack. Chill until cold, at least 2 hours. (Can be made 2 days ahead. Cover; keep chilled.)

For the chocolate sauce, bring cream to simmer in medium saucepan. Remove from heat. Add chocolate; whisk until smooth. Top each pot with a layer of chocolate and return to refrigerator until set.


https://www.barbieinablender.org